When you buy your first camera, the plethora of settings and buttons can be daunting, and it is understandable that most people will leave it on Auto mode. Today we’ll dive deeper into the settings for white balance. The numbers used to set your white balance can be confusing if you are not sure what they mean.
White balance is a setting on your camera that controls the overall color tone of the image. Our human eyes automatically control this so you don’t notice this throughout the day. If you didn’t know, different sources of light transmit different tones of color.
In this article, we are going to get a better understanding of what white balance is and how it works. Luckily for us, most modern cameras allow you to adjust white balance in a matter of a couple buttons. And for other cases, you can use Lightroom or Photoshop to change your white balance on a photo afterward.
What is White Balance?
All light has color. Some light will appear warmer or more yellow, for example, the light from a candle. While other light, day light, will appear bluer or cooler. On auto white balance, your camera body will automatically make these adjustments so that your pictures will look normal.
Ultimately, when the white balance setting is on auto, the camera will do its best to keep all whites in the frame truly white without a blue nor yellow tint.
Unlike our eyes, a camera cannot adapt precisely to changes in lighting; the built in camera color metering assists with this. In most cases, white balance works correctly on Auto mode. However, the results rendered from your camera sensor may give a different result then what you would expect. For instance, you may get an image with blue tones on an overcast day.
White Balance Values
White balance uses a temperature scale in units of Kelvin (K) and an original reference point is the sunlight at noon. Sunlight is considered to be 5500K.
If the light conditions are bluer, the white balance will be high on the Kelvin scale. And vice versa, if the light conditions are more yellow, for example, during sunset, your white balance will be lower on the Kelvin scale.
We created a quick cheat sheet with the recommended white balance temperature value to select depending on the type of light.

Good news, you don’t need to know the exact temperature values. Just use this cheat sheet to remember which white balance setting goes with which condition.
White Balance Presets
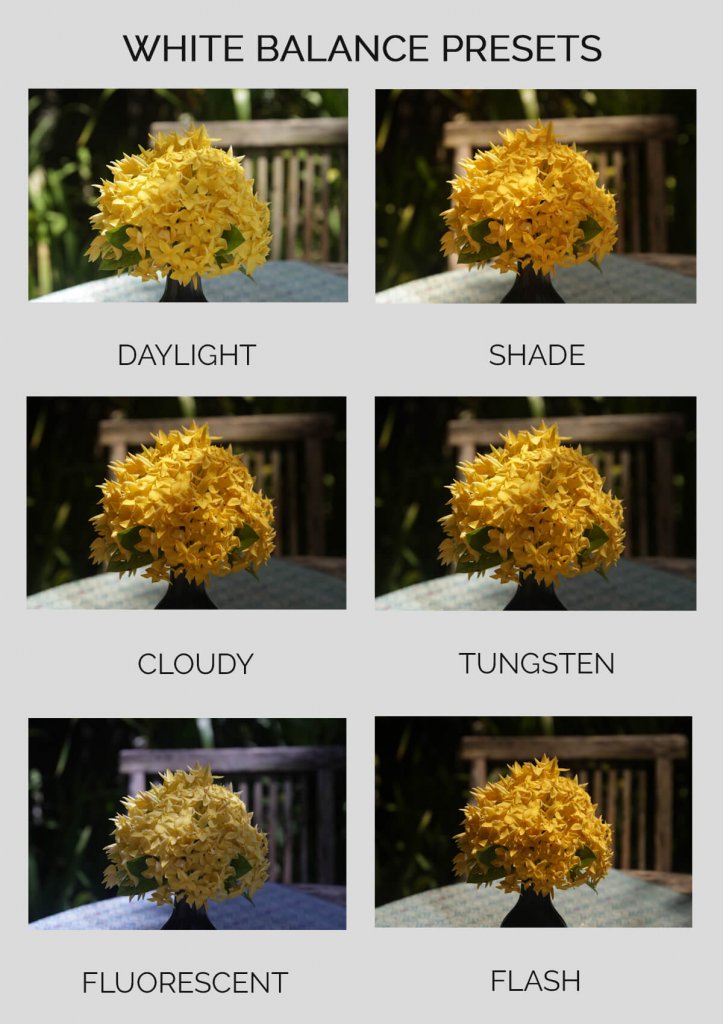
All digital cameras now have presets for white balance such as Auto, Daylight, Shade, Cloudy, Tungsten, Fluorescent, and Flash.
Here’s a series of pictures of flowers using different white balance presets to show you how the color of the light changes depending on the presets:
Honestly, most photographers almost always will use Auto for their white balance. This is especially true when the lighting conditions are constantly changing. Moreover, it would be one less setting to worry about on top of shutter speed, aperture, and ISO.
However, if you are shooting with a controlled lighting source, for example, in a studio, choosing a custom white balance will making your post processing much easier.
How to Manually Set Your White Balance
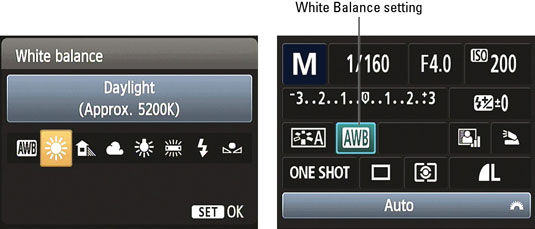
Now that you have a better understanding of the color of light and its ‘K’ temperature, you can select the Kelvin value to get a perfect image in different lighting situations.
You have the ability to control your white balance on most camera modes, such as M, Av, Tv, and P.
You have a lot of options when it comes to white balance. Remember to shoot in RAW because If you didn’t choose the correct white balance for a particular scene, you can always correct it using Adobe Lightroom.

One thought on “Introduction to White Balance”