Bucket List: Backpacking Mount Whitney
This backpacking Mount Whitney adventure is the epitome of spontaneity. Moreover, this trip has tested my limits and strengthened my will power and appreciation for Mother Nature. I want to share with you my experience on this trip so that it may inspire and guide you to the same rewarding experience I’ve had. The Mount Whitney exploration all started with my friend, Chris, asking me if I had some camping and backpacking equipment he can borrow. I generously agreed to let him borrow anything he needed for his backpacking trip to Mt. Whitney. At first, I didn’t know that summiting Mount Whitney was on a multitude of outdoor enthusiast’s bucket list. After some researching, I was getting excited myself. I took the initiative to ask my friend if there were any room left for me to join their group. Unfortunately, I had to find myself a permit to backpack with them. And as most of you already know, it’s tough to get permits for a popular location like the Whitney trail. In the end, I had to resort to a walk-in permit, which puts me at a risk of driving all the way to lone pine and not joining them. That did not stop me.
I was determined to join them on this special journey. I prepared my hiking pack along with food prep for the 4 day 3 night adventure on the Mount Whitney Trail. Friday morning in July, the outdoor gods were watching over me and granted my wish! We drove northbound to Lone Pine, CA to get our permits. I was able to get a hold of the last permit for Friday entrance into the Mount Whitney Zone. The only thing was that my group was entering Saturday. This meant I had to hike up to Lone Pine Lake by Friday, camp there, and wait for my group to arrive Saturday morning. Although the thought of hiking and camping solo at a location I’ve never been before was intimidating, I hastily and excitedly agreed. My group of awesome friends (David, Doreen, John, and Chris) stayed at Horseshoe Meadows campground Friday night while I stayed Lone Pine Lake Friday night. We then rendezvous at Lone Pine Lake Saturday morning and continued our join to the peak of Mt. Whitney. I will highlight the many awesome moments we had as a group throughout our trip with some pictures and captions.
Note: This article is image intensive so be patient and let the images load. You won’t regret it! Also, if you want to scroll all the way up, there is a button on the bottom right of the page.
Table of Content:
- Lone Pine CA
- Horseshoe Meadows Campground
- Drive to Whitney Portal
- Whitney Portal
- Trail Entrance
- Alpine Trees
- Lone Pine Lake
- Whitney Zone Entrance
- Meadows
- Outpost Camp & Waterfall
- Mirror Lake
- Trailside Streams
- Consultation Lake
- Trail Camp
- Star Gazing at Trail Camp
- Getting Ready For Summit
- 99 Switchbacks
- The Cables
- Trail Crest
- John Muir Trail Junction
- Westside Of Mt. Whitney
- Mount Whitney Windows
- Hitchcock Lake & Guitar Lake
- Summit House
- Summit View
- Gear List
- Food List
Please feel free to leave comments or questions. I’d love to help anybody who’s has this trip planned in the future.
Lone Pine, CA
After getting our permits, we filled ourselves up with some delicious all you can eat Chinese food for the start of trip.
Horseshoe Meadows Campground
After we devoured our food and carb-loaded, we were off to horseshoe
meadows campground where my group stayed Friday night. The switchbacks
on the way up the campground were gruesome, especially on our cars,
which were a Honda Civic Hybrid and a Subaru WRX. But the view from up
top was spectacular! We took a group photo and it was actually the only
group photo we took the whole trip. More details on that later! When we
arrived, I helped them upload and watched them set up camp. We later
explored the area to see what was around us.Our fun-filled nature had us thinking of crazy things to do, like strapping a solar panel on the back of our friend Doreen.And
after we settled in, Chris was going to hammock camp overnight. To say
the least, he struggled for a bit setting up his hammock but eventually
he was able to get his hammock to hang.We
then explored around the area and found a really awesome view of the
wilderness and mountains. John and Chris definitely shared a special
moment here.Afterwards,
we headed back to camp and started making dinner for the night. It was
around 4pm when we started and I headed out towards the Mt. Whitney
trail by 5:30pm.I
ate a hearty dinner before hitting the trail towards Lone Pine Lake.
During dinner, there were thunder, which intimidated me since I knew I
had to hike up by myself at night. But I was still determined to get to
Lone Pine Lake.
The Drive to Whitney Portal
The view driving up to Mt. Whitney was nothing short of spectacular. I was constantly in awe, seeing the beauty during sunset. You can see the infamous Mt. Whitney windows as you drive closer and closer to Whitney Portal. I started the trail around sunset and hiked throughout the night. It was a bit scary hiking alone at night, but it was definitely a rewarding experience. It tested my composure, self-control of my thoughts, and refined my focus and determination on the task at hand. I knew I needed to get to Lone Pine Lake as soon as possible to set up camp before it rained. I was feeling the fatigue from the high altitude, which I did no training for. Fortunately, I brought along some altitude sickness medication to alleviate the symptoms. I stayed hydrated as much as possible and did the ~3 mile hike up to Lone Pine Lake in about 1.5 hours.
Whitney Portal
When you drive up to Whitney Portal to park, you’ll see the Mt. Whitney Portal Store, campsites, fishing lake, waterfalls, and the trailhead for the Mt. Whitney trail. I didn’t spend much of my time here at the start of the hike but I enjoyed a well-deserved bacon cheese burger after the long ~22 mile hike. In addition, I didn’t get a chance to weigh my pack before the trail but John, Chris, and I did weighed our packs on our way back to Whitney Portal. Looks like I get the cookie for the lightest pack! This is even with my camera gear inside! Woohoo!
Trail Entrance
You will see this sign a couple hundred feet from the Whitney Portal
restaurant, signifying the trail-head for the Mount Whitney Trail. There
will be a weigh station for your backpack along with a plethora of
information on safety and proper protocols to leave no trace and pack
your waste out. This can be found at the wooden structure in the left of
the picture below.
Alpine Trees, Redwood Trees, and more Trees
For about three miles, you will be surrounded by trees and a beautiful
view. On a hot day, I foresee the shade as being your friend but for me,
I powered through this three miles at night to reach Lone Pine Lake in
about 1.5 hours. I was hiking at night and in the middle of a
rain/thunderstorm so I needed to set up camp as soon as possible. There
will be quite a bit of switchbacks and it’s all uphill from the
trail-head. You’ll also walk on logs that has water flowing underneath. I
also remember crossing a very small waterfall that is at most ankle
deep. I had my trusty Columbia waterproof boots so my feet were dry.
Take plenty of breaks to acclimate your body to the high altitude. There
will be an option to take the Mountaineer’s Route within these three
miles.
Lone Pine Lake
This alpine lake, roughly at 10,000 feet elevation, has a beach, camp sites, and a beautiful view of mountains. This location is where I stayed Friday night and can be a great day hike if you camp at Whitney Portal. Hiking to this lake does not require an overnight pass. I arrived at Lone Pine Lake at night and was beyond exhausted. I set up my tent and knocked out. I woke up the next morning to spectacular views and breathtaking scenery. I had the whole place to myself and did not regret camping here one bit!Throughout the morning, I explored around Lone Pine Lake area, enjoying Mother Nature and everything she has to offer. I was mesmerized with every turn I took. Take a look at the pictures and see for yourself.My friend John was the first to arrive at my camp site at Lone Pine Lake while the others were making their way up. While we waited, I showed John around the lake and some cool spots. We found a cave that looked absolutely badass. We did quite a bit of portraits here at Lone Pine since the others took a while to get here. Backpacking Mt. Whitney requires a “wagbag”. What’s a wagbag? Well, whenever you have to go #2, you have to go into the wagbag and carry it with you throughout the journey. How wonderful right? While we explored around Lone Pine Lake, we found the sweetest spot to go #2 into our wagbag. You can see John’s demonstration below. Don’t worry, he’s not actually defecating.
Chris finally arrived and relayed the message that David and Doreen are coming shortly after. So we continued our shenanigans along with Chris.After about 30 minutes, we had a hunch David and Doreen missed the trail to Lone Pine Lake, so Chris decided to go up and down the trail to find them. He was able to finally catch up to them half a mile down the trail. We packed up our packs and continued our journey.
There will be a sign that informs you the entrance to the Whitney Zone.
Please make sure you have permits or else you will be fined. There are
rangers patrolling the trail and we passed by a couple of them. Along
the trail, we took many breaks to adjust to the high altitude and of
course to take more portraits of ourselves amongst the beautiful
scenery.
Meadows
After some more switchbacks, you’ll descend a bit into a beautiful meadow that will eventually lead you to Mirror Lake. You can take a break here and enjoy the gorgeous views and take in the crisp air. We decided to break for a bit to do a small photo op!
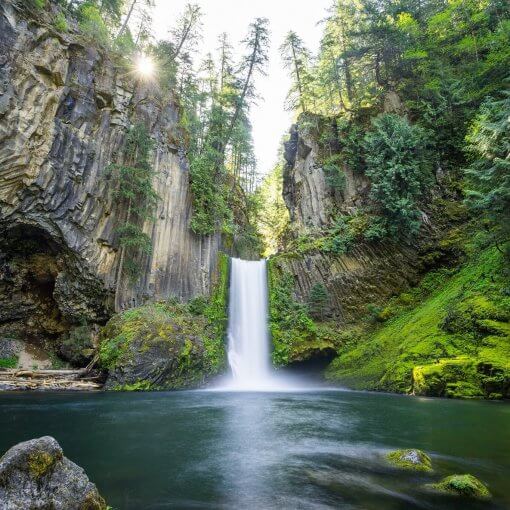
Outpost Camp and Waterfall
The next section after the meadows is Outpost Camp, where you can set up camp and continue the following day. There is also a waterfall here and crystal clear running streams. We took another break here to refill on water and to regain our energy on some trail snacks. And yes we did another photo op here. John got a bit carried away with the poses.
Mirror Lake
After we passed outpost camp and the outpost camp waterfall, we arrived at Mirror Lake, which was breathtaking! See for yourself! For me, this lake revived me on this trail, since the high altitude was taking a toll on my body. It felt like it took forever to reach Mirror Lake from Outpost Camp. Mirror Lake is covered and surrounded by a bunch of trees and mountain. We did another mini photo op here too!
Trailside Meadows & Streams
After Mirror Lake, prepare yourself for a lot of rocks and gravel. It’ll be the most rocks and gravel you’ll see in any area. You’ll see granite for a while until you run into the trail-side meadows and streams, which you can use to refill your water, rest, and take some more pictures. The stream comes from the snow during the past storm. During July, there was still water running but no flowers.
Consultation Lake
When you see this gigantic alpine lake, you are very close to Trail Camp. I remember that I was a bit delirious when I saw this lake and at the same time relieved because I knew we were very close to our destination for the day. The trail does not get you near Consultation Lake so take some pictures once you see it. You’ll get another opportunity to see the Lake when you start your journey to the summit on the switchbacks.
Trail Camp
I remember when I saw the sign for Trail Camp I was beyond relieved to finally stop hiking. This is the campground for overnight hikers. Many backpackers set up camp and refill water here and there is plenty of flat space to set up your tents. This is also the LAST spot to refill your water on the trail so make sure you plan accordingly. There is also a way to get to Consultation Lake but we were too tired and exhausted to visit. We quickly set up our tents, unpacked our sleeping bags, and prepared dinner. Don’t be surprised when you hear howling at night since this area is prone to high winds.
Star Gazing at Trail Camp
After settling in, unpacking our packs, setting up our tents, and cooking our dinners, I decided to stay up a bit to watch the stars. Although you’ll be exhausted, I highly recommend to just hang outside your tent and star gaze.
Getting ready for Summit
Before we hit those gruesome switchbacks, we packed all our snacks and water for the summit. You can leave your tent, sleeping bags, and other miscellaneous items at the campsite. It is safe to leave your gear here. One thing I love about hikers and backpackers: honesty and camaraderie!
97-99 Switchbacks


Anyone who has researched Mt. Whitney has heard of these gruesome
switchbacks. They are truly brutal and strenuous. There’s a debate
whether it’s really 99 switchbacks or not. Some counted less, some
counted more. Nonetheless, this is the first big obstacle to surpass on
the way to summit. One good thing about these switchbacks is that it
gives you a better bird’s eye view of Trail Camp and the surrounding
areas. Storytelling and a good playlist will make this a lot easier.
The Cables

You’ll eventually get to an area where the trail gets really narrow.
Cables have been placed here to prevent hikers and backpackers from
falling off. I remembered I hugged the granite wall like white on rice.
No joke; it’s a steep drop from the trail.
Trail Crest


This area is where you can actually see both the west and east side of
Mount Whitney. I’d suggest to take caution if you are a bit delirious
and lightheaded. Although the trail is a bit wider than the cables, you
can easily fall off the trail. Take a break, drink some water, and take
some pictures here. That’s what I did.
John Muir Trail Junction (JMT)


This junction is actually pretty obvious since you’ll see a lot of
hikers that are on the JMT leave their packs here to summit Mount
Whitney. There’s also a sign that tells you how many more miles you have
to suffer until summit. It’ll be the longest 1.9 miles you’ll ever
hike. It was for me at least.
Westside of Mount Whitney


The westside of Mount Whitney is completely exposed to winds and the
sun. You’ll see plenty of complex rock and granite formations, giving
more reasons to stop and take pictures.
Mount Whitney Windows
When you get closer to the summit you’ll actually hike in between the
windows of Mt. Whitney, which can be seen from the Meadows section of
the trail. Be very careful here since it’s a very steep and deadly fall.
There will also be high winds to throw your balance off.
Hitchcock Lake and Guitar Lake
One of my favorite views of the hike is seeing Hitchcock and Guitar
Lake. You get to experience how big and vast the Earth is and how high
Mount Whitney is.
Approaching the Summit House
As you approach the summit, the granite becomes a bit bigger and the
trail becomes less distinguishable. Be aware and cautious of your steps
since some of these rocks are loose. Honestly, I was very delirious at
this point to know where I was going. Luckily, there were hikers still
on the trail for me to figure out the right direction. At the summit
house there will be a book for you to sign your signature and leave a
note. Unfortunately, when we arrived, there were no books for us to sign
our names into but we have a bunch of pictures to record our hard
journey.
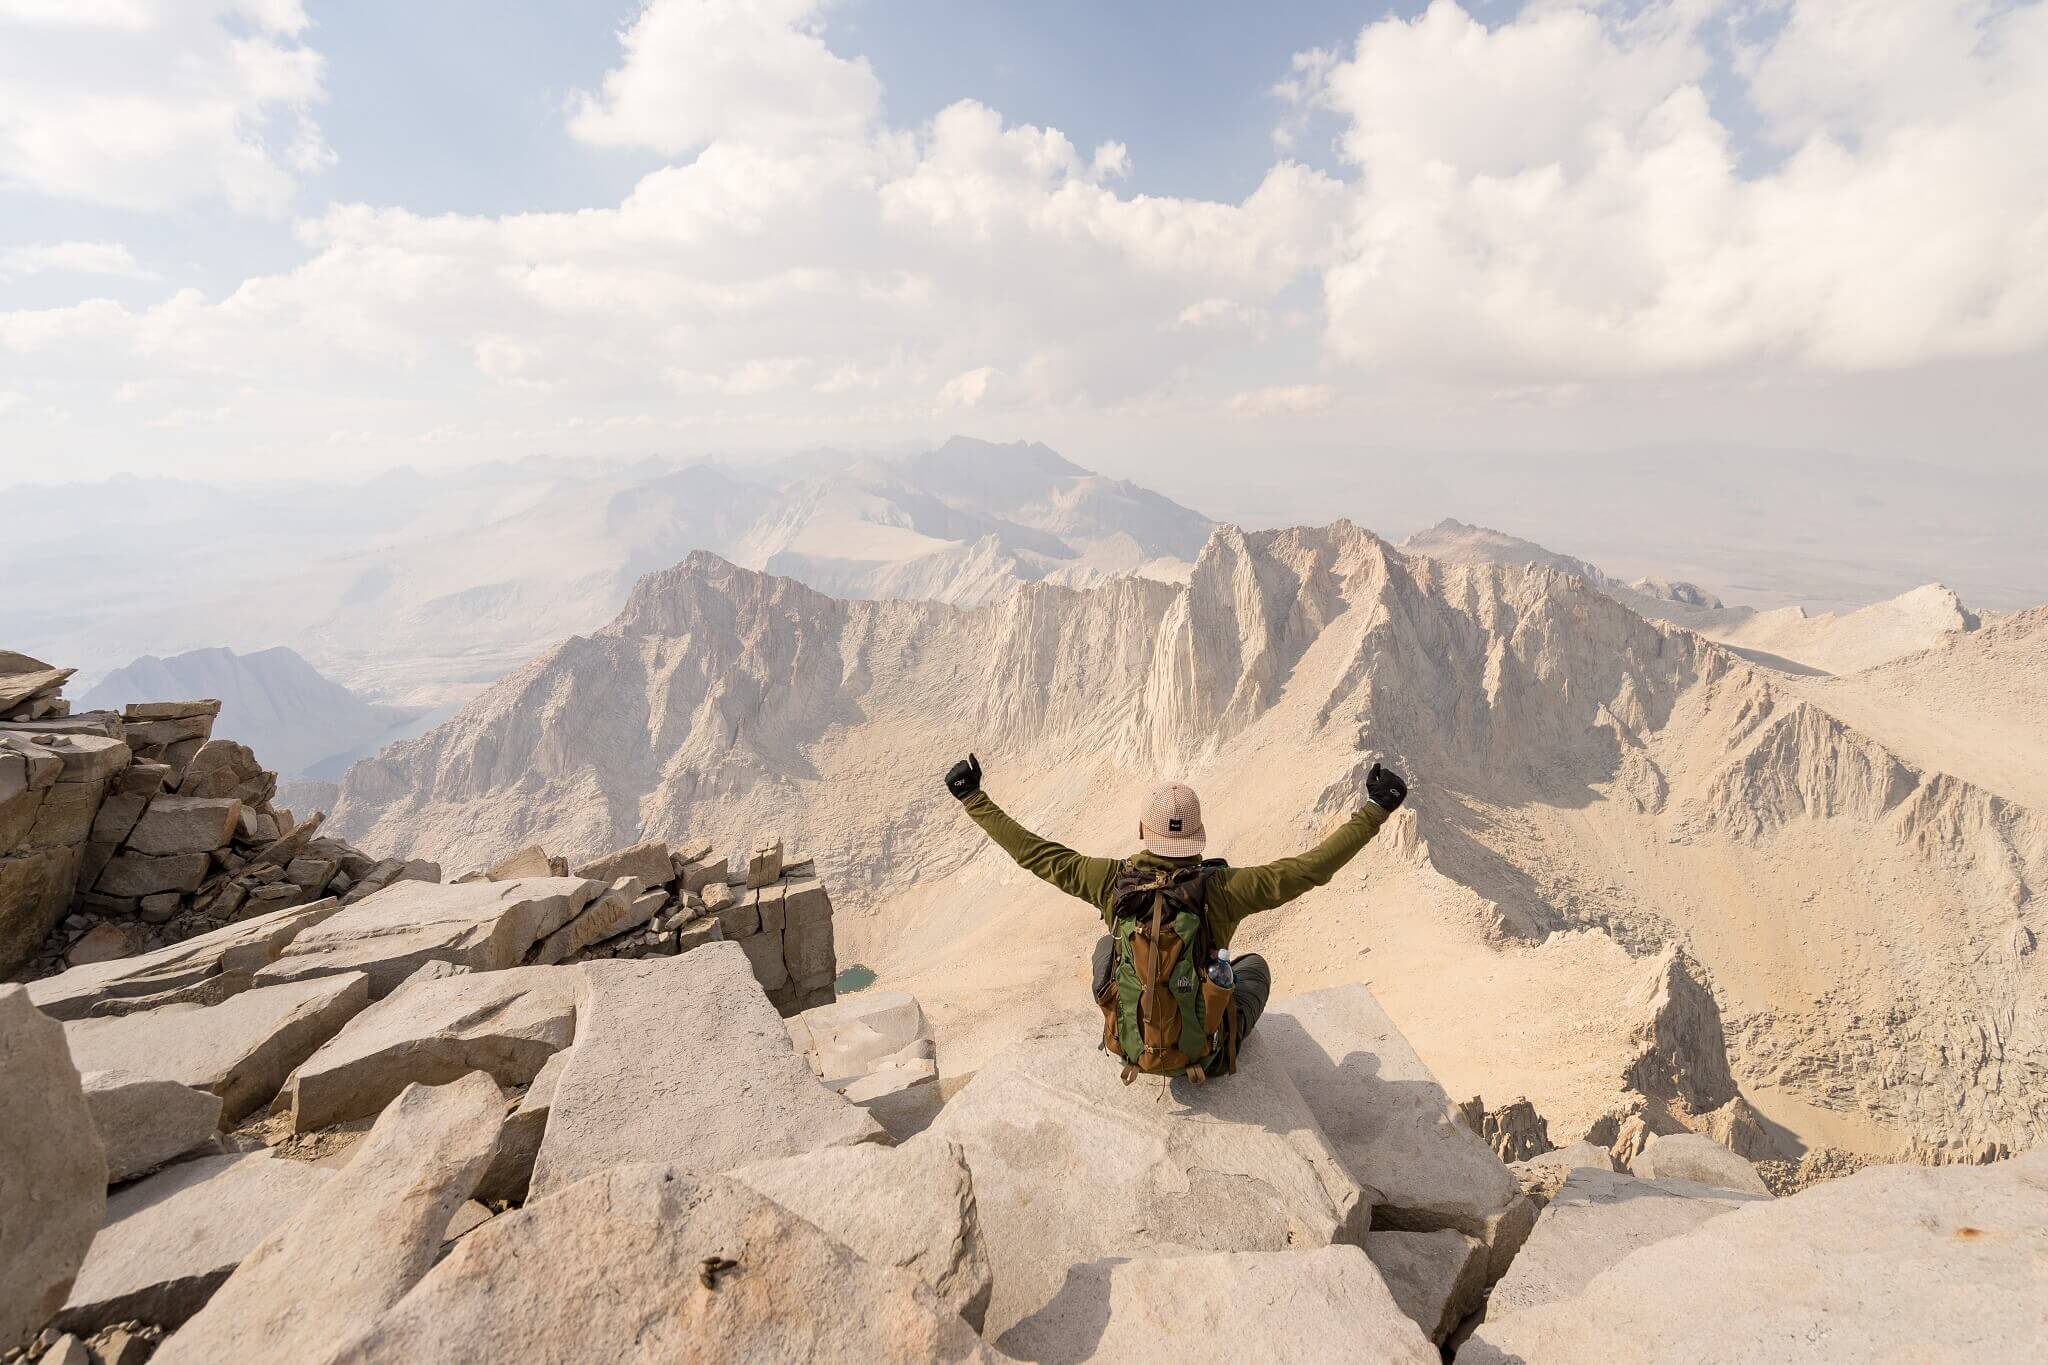
Summit View
When you’ve reached the summit, you’re now on top of the tallest
mountain in the lower 48 states. Take plenty of pictures with amazingly
beautiful view and the placard rock. Breathe in plenty of the crisp air
and just embrace the beauty that Mother Nature has to offer.Leave me a comment below or share this post if you’ve enjoyed my journey. If this is in your itinerary in the future, check out www.WhitneyZone.com.
That site has plenty of useful information to make the trip safe and
comfortable. I used it myself and I wouldn’t have made it without it.
I’ll end this blog with a gear list of items I used during this journey.
Cheers!
Gear List
Pack
Granite Gear Torso Blaze Ac 60 Pack (Cactus/Java, Regular)
Sleeping System
Marmot Limelight 3 Persons Tent, Green, One
Thermarest NeoAir XLite Mattress
Rei Igneo Sleeping Bag
Camera System
Sony Alpha a7II Mirrorless Digital Camera – Body Only
Sony 16-35mm Vario-Tessar T FE F4 ZA OSS E-Mount Lens
MeFOTO A0350Q0K Aluminium Backpacker Travel Tripod Kit (Black)
Water System
Sawyer Products SP103 Mini Water Filtration System, Single, Orange
Evernew Water Carry 2000Ml
CamelBak 90352 Omega Water Reservoir, 100 oz., Black
Miscellaneous
Komperdell C3 Carbon Powerlock Compact 1752311-10
BearVault BV500 Bear Proof Container Bear Vault
Leatherman 830850 Skeletool CX Multitool
Clothing
Vapor Apparel Men’s UPF Long Sleeve Solar Performance T-Shirt Large White
Champion Men’s Powertrain Performance T-Shirt, Black Heather, X-Large
SUB Sports DUAL Compression Base Layer Boxer Briefs – Black – L
Darn Tough Merino Wool Boot Sock Full Cushion,Black,Large
Columbia Men’s Mudhawk Waterproof Hiking Boot,Mud/Maple Sugar,10 D US
Columbia Silver Ridge Convertible Pant, 32×30, Tusk
Outdoor Research Men’s Arete Gloves, Black/Charcoal, Large
Cooking System
Flash Personal Cooking System, Carbon
Light My Fire Original BPA-Free Tritan Spork with Full-Sized Spoon, Fork and Serrated Knife Edge, Green
Optimus Canister Fuel 3.88oz
TOAKS Titanium 450ml Cup